CANTONESE STYLE ROAST DUCK
The Roommate is a big fan of impulse buying, especially when it comes to food - I have learned to never send him to the grocery, markets, Costco or any food-related venue unsupervised. Unfortunately, (or maybe fortunately in this case) he occasionally goes rogue and comes home with ingredients worthy of a gastronomic challenge. Case in point: two whole ducks from Costco. I have never cooked duck before. He has never cooked duck before. So we spent a solid 48 hours googling different duck recipes, and decided to do a “Who did it better?” challenge of takeaway Chinese roast duck vs. home-cooked Chinese roast duck.
I’m no duck expert, but having been raised on a LOT of Chinese roast meats through the years, I knew at least the basics of what I needed to achieve: crispy, crispy skin (this is a must), and juicy, tender meat that doesn’t dry out. I also didn’t want to roast it in an oven, and The Roommate was adamant about sticking as close to traditional methods as possible. So, we decided to try roasting the ducks in our outdoor smoker, using hot coals instead of wood to avoid the smoky flavour. Simple, right?
In theory only. While the method is relatively uncomplicated, proper Chinese roast duck is an exercise in patience. Extreme patience, especially when you have poor time management skills and find yourself doing much of the prep at 11pm. First, you have to remove any innards and extra fat from the interior of the duck, if it isn’t already cleaned. Then, you marinate the inside of the duck with a combination of salt, Chinese five spice, and white pepper. Some recipes also call for wet ingredients like hoisin sauce, sesame paste, garlic, etc. but we kept it super simple and used dry marinade ingredients only. I now also regret not having taken a photo of myself with half my arm up a duck’s bum, but you can use your imagination. :) Next, you stitch up the cavity with a metal or bamboo skewer, threading it cross-wise to ensure no moisture will get inside the cavity.
Now it’s time to bathe the duck. That’s right. Bathe. First, in boiling water for a couple of minutes using a ladle, (or you can dunk the whole duck in the pot for a couple of seconds, but I didn’t want to risk any of the water getting inside the duck), so that the skin tightens up nicely which will help make it extra crispy. Once it’s dried, it takes a second bath (technically 5 baths) in a glaze made of maltose syrup, Chinese cooking wine, Chinese vinegar, and hot water. This step requires some patience as you need to let each layer of glaze dry before ladling on the next 5 layers. By the time we finished this stage, it was 11:30pm, to give you an idea of the level of patience required.
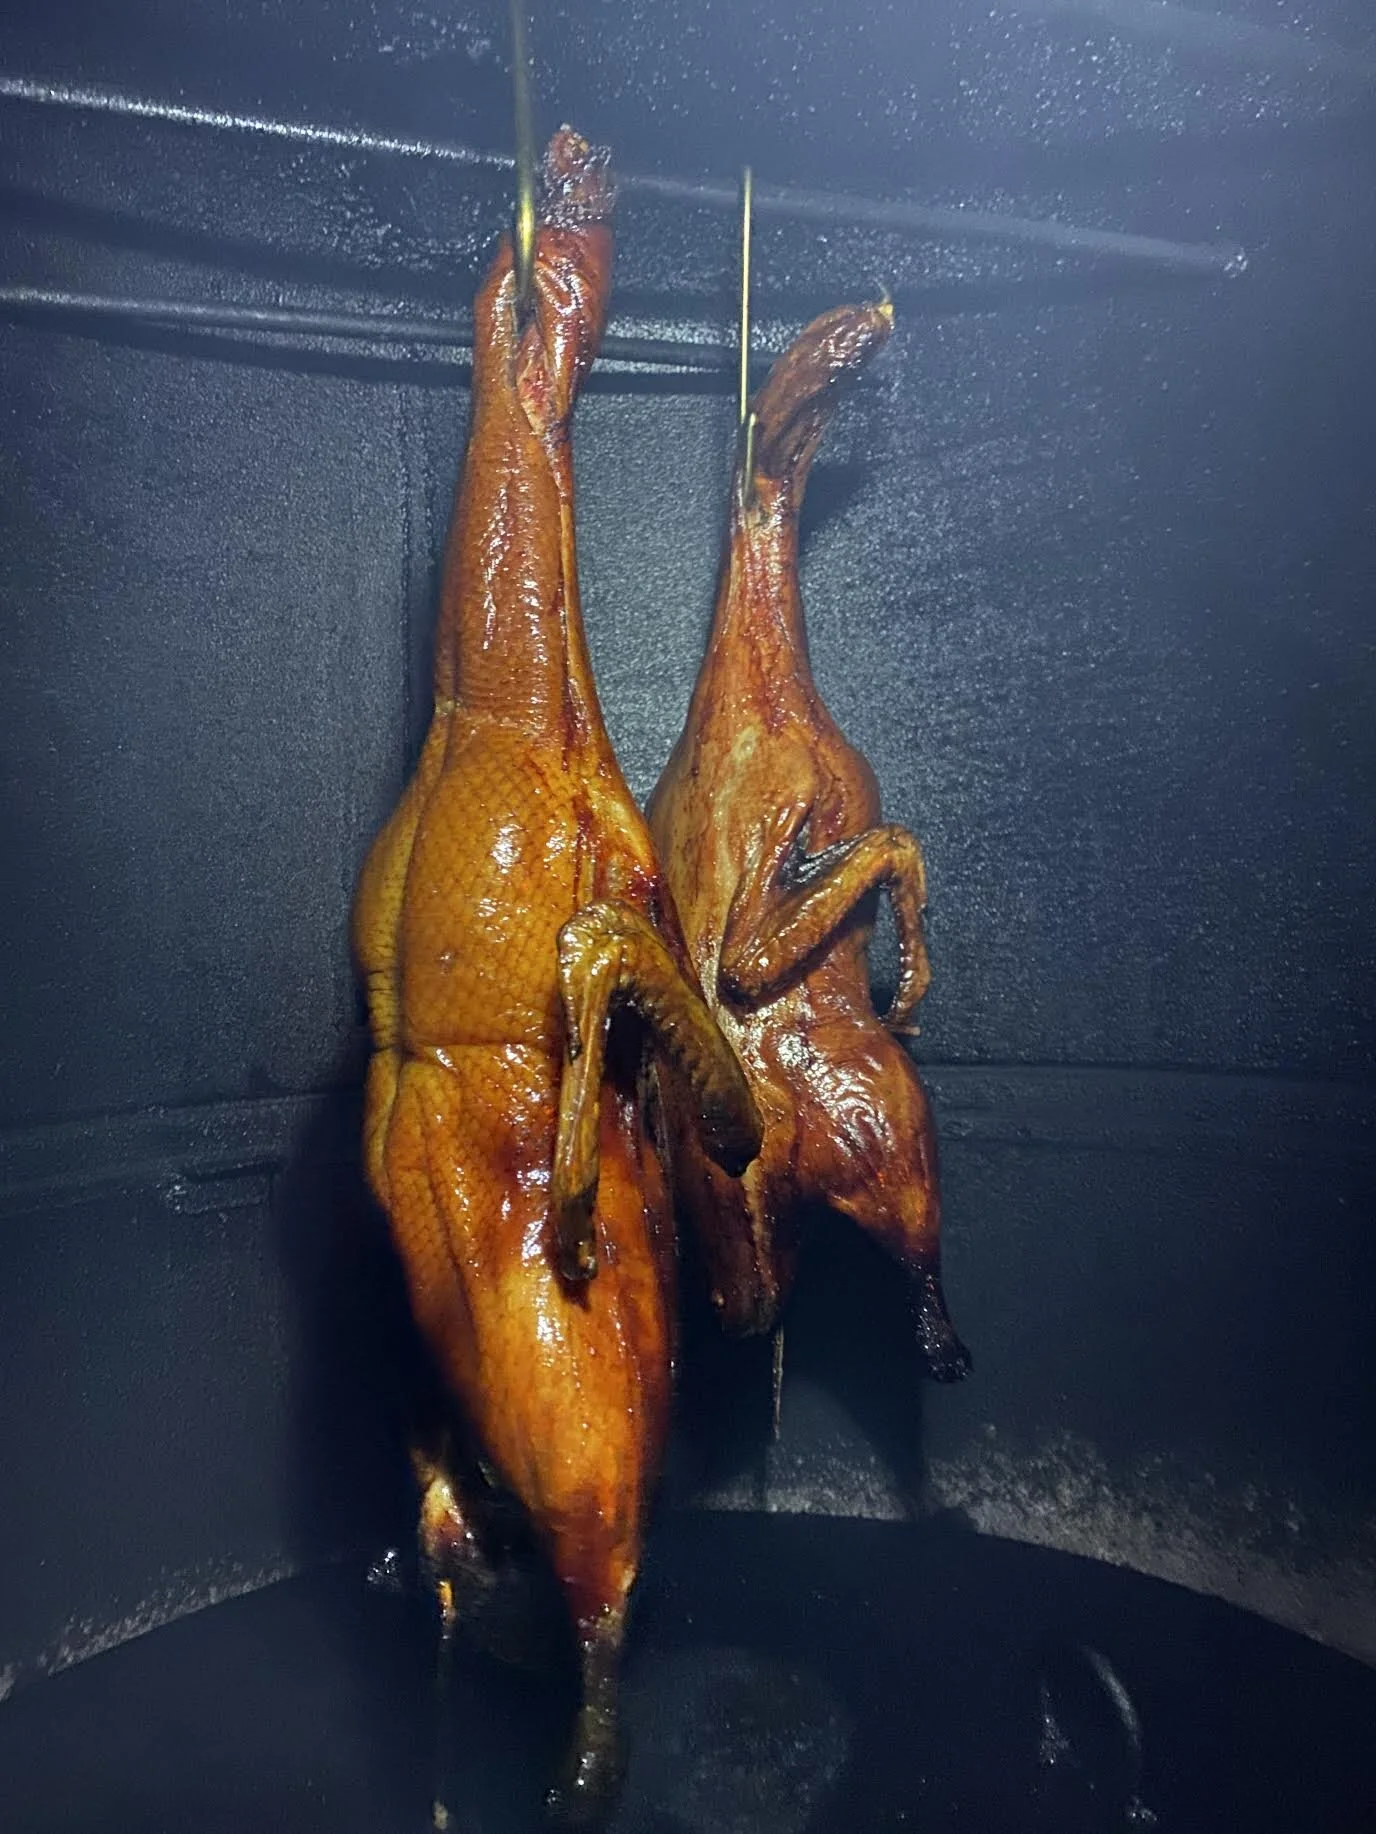
Now, let it hang. For at least 8 hours, or however long it takes for the skin to dry completely. I cannot stress enough how important it is to LEAVE IT THE DUCK ALONE until completely dried. Dried skin = crispy skin, so do NOT rush this. If you really want, you can help it along with a hair dryer, but otherwise, find something else to do for 8-12 hours. We let ours hang for almost 18 hours because…poor time management skills. But it worked in our favour this time because the skin dried out beautifully!

Then the real trauma began. One advantage of oven roasting is the ability to control the temperature, and quickly. We, however, had the pleasure of dealing with a smoker that was too hot, then too cold, then too hot again, too smoky, unable to maintain temperature…to sum up, 4 hours and 3 dramatic tantrums later (not me) I was about ready to commit some kind of felony using a duck carcass, but then miraculously the smoker calmed down, we were able to maintain proper heat levels, and the duck went in. Immediately we could hear the fat sizzling away, the duck being basted in its own fat, and I cannot even describe all the delicious smells that were wafting out of that smoker. I didn’t even care that I had been standing outside, at night, in near freezing temperatures, for four hours. After about 20-30 minutes at 200C (or 4ooF) we lowered the heat to about 180C (350F) and roasted for another 30 minutes - generally, it takes about 20 minutes per kilogram of meat.
Then finally, FINALLY, at 10:30pm, we removed the duck, crispy, juicy, and glistening, and went to town on it with the meat cleaver. Verdict: Totally worth the time, the meltdowns, and freezing temperatures. And, better than some takeaway!

Ingredients:
2 whole ducks, cleaned (about 1.5 kg each)
3 tbsp salt
1 1/2 tsp Chinese five spice
1/2 tsp white pepper
1 cup maltose syrup
1/2 cup Chinese cooking wine
1/2 cup Chinese vinegar
4 cups hot water
Method:
1. Clean duck and remove any extra fat and giblets etc from the cavity
2. Combine salt, Chinese five spice and white pepper in a small bowl. Mix well and rub the spices all over the interior of the cavity. Using a metal or bamboo skewer, stitch up the cavity so that no liquid can seep in.
3. Set a large pot of water to boil. Hang the duck over the pot (or you can hold it by the neck, but be careful!) and ladle over the boiling water for about 2 minutes until the skin has tightened and taken on a white/pale yellow colour. Leave the duck to air dry for several minutes.
4. Once the skin is dry, mix together the maltose syrup, cooking wine, vinegar and hot water in a large mixing bowl or another large pot. Ladle the mixture over the duck for several minutes. Allow to dry completely, then repeat until you’ve done 5-6 layers of glaze. You can also let the duck rest on some baking racks to dry if you have nowhere to hang them, as long as there is plenty of air circulation around the duck. Once the glazing is done, let the ducks hang (or dry on the racks) for a minimum of 8 hours, or until the skin is completely dried out.
5. Preheat your smoker or oven to 200C. Roast the duck for 30 minutes, then lower heat to about 180C and roast for another 30 minutes, or until the internal temperature of the duck has reached 75C.